
Fresh Pasta Basics

There are many variations of pasta dough, but when you’re just getting started, it’s good to master two different “mother” doughs. Once you’ve gotten used to making them, and especially to feeling out the correct consistency and hydration with your hands, you can start experimenting with a mix of flours or additives, such as spinach, beetroot, or saffron.
Below I detail a basic egg pasta dough, and a basic eggless semola dough. If you want to learn more about different flours, click here.
Fresh Egg Pasta Dough
This dough is the gold-standard for many northern pasta recipes, including long cut shapes like tagliatelle and stuffed pastas like tortellini.
Before beginning, weigh out your flour. The photos below use 400g of 00 flour and 4 local eggs, but the general rule of thumb is 100g of 00 flour for each egg, so you can scale as needed.
If you have a wooden board large enough, use it! The wood is perfect for dealing with the hydration in the dough, and it is useful for creating the proper texture.
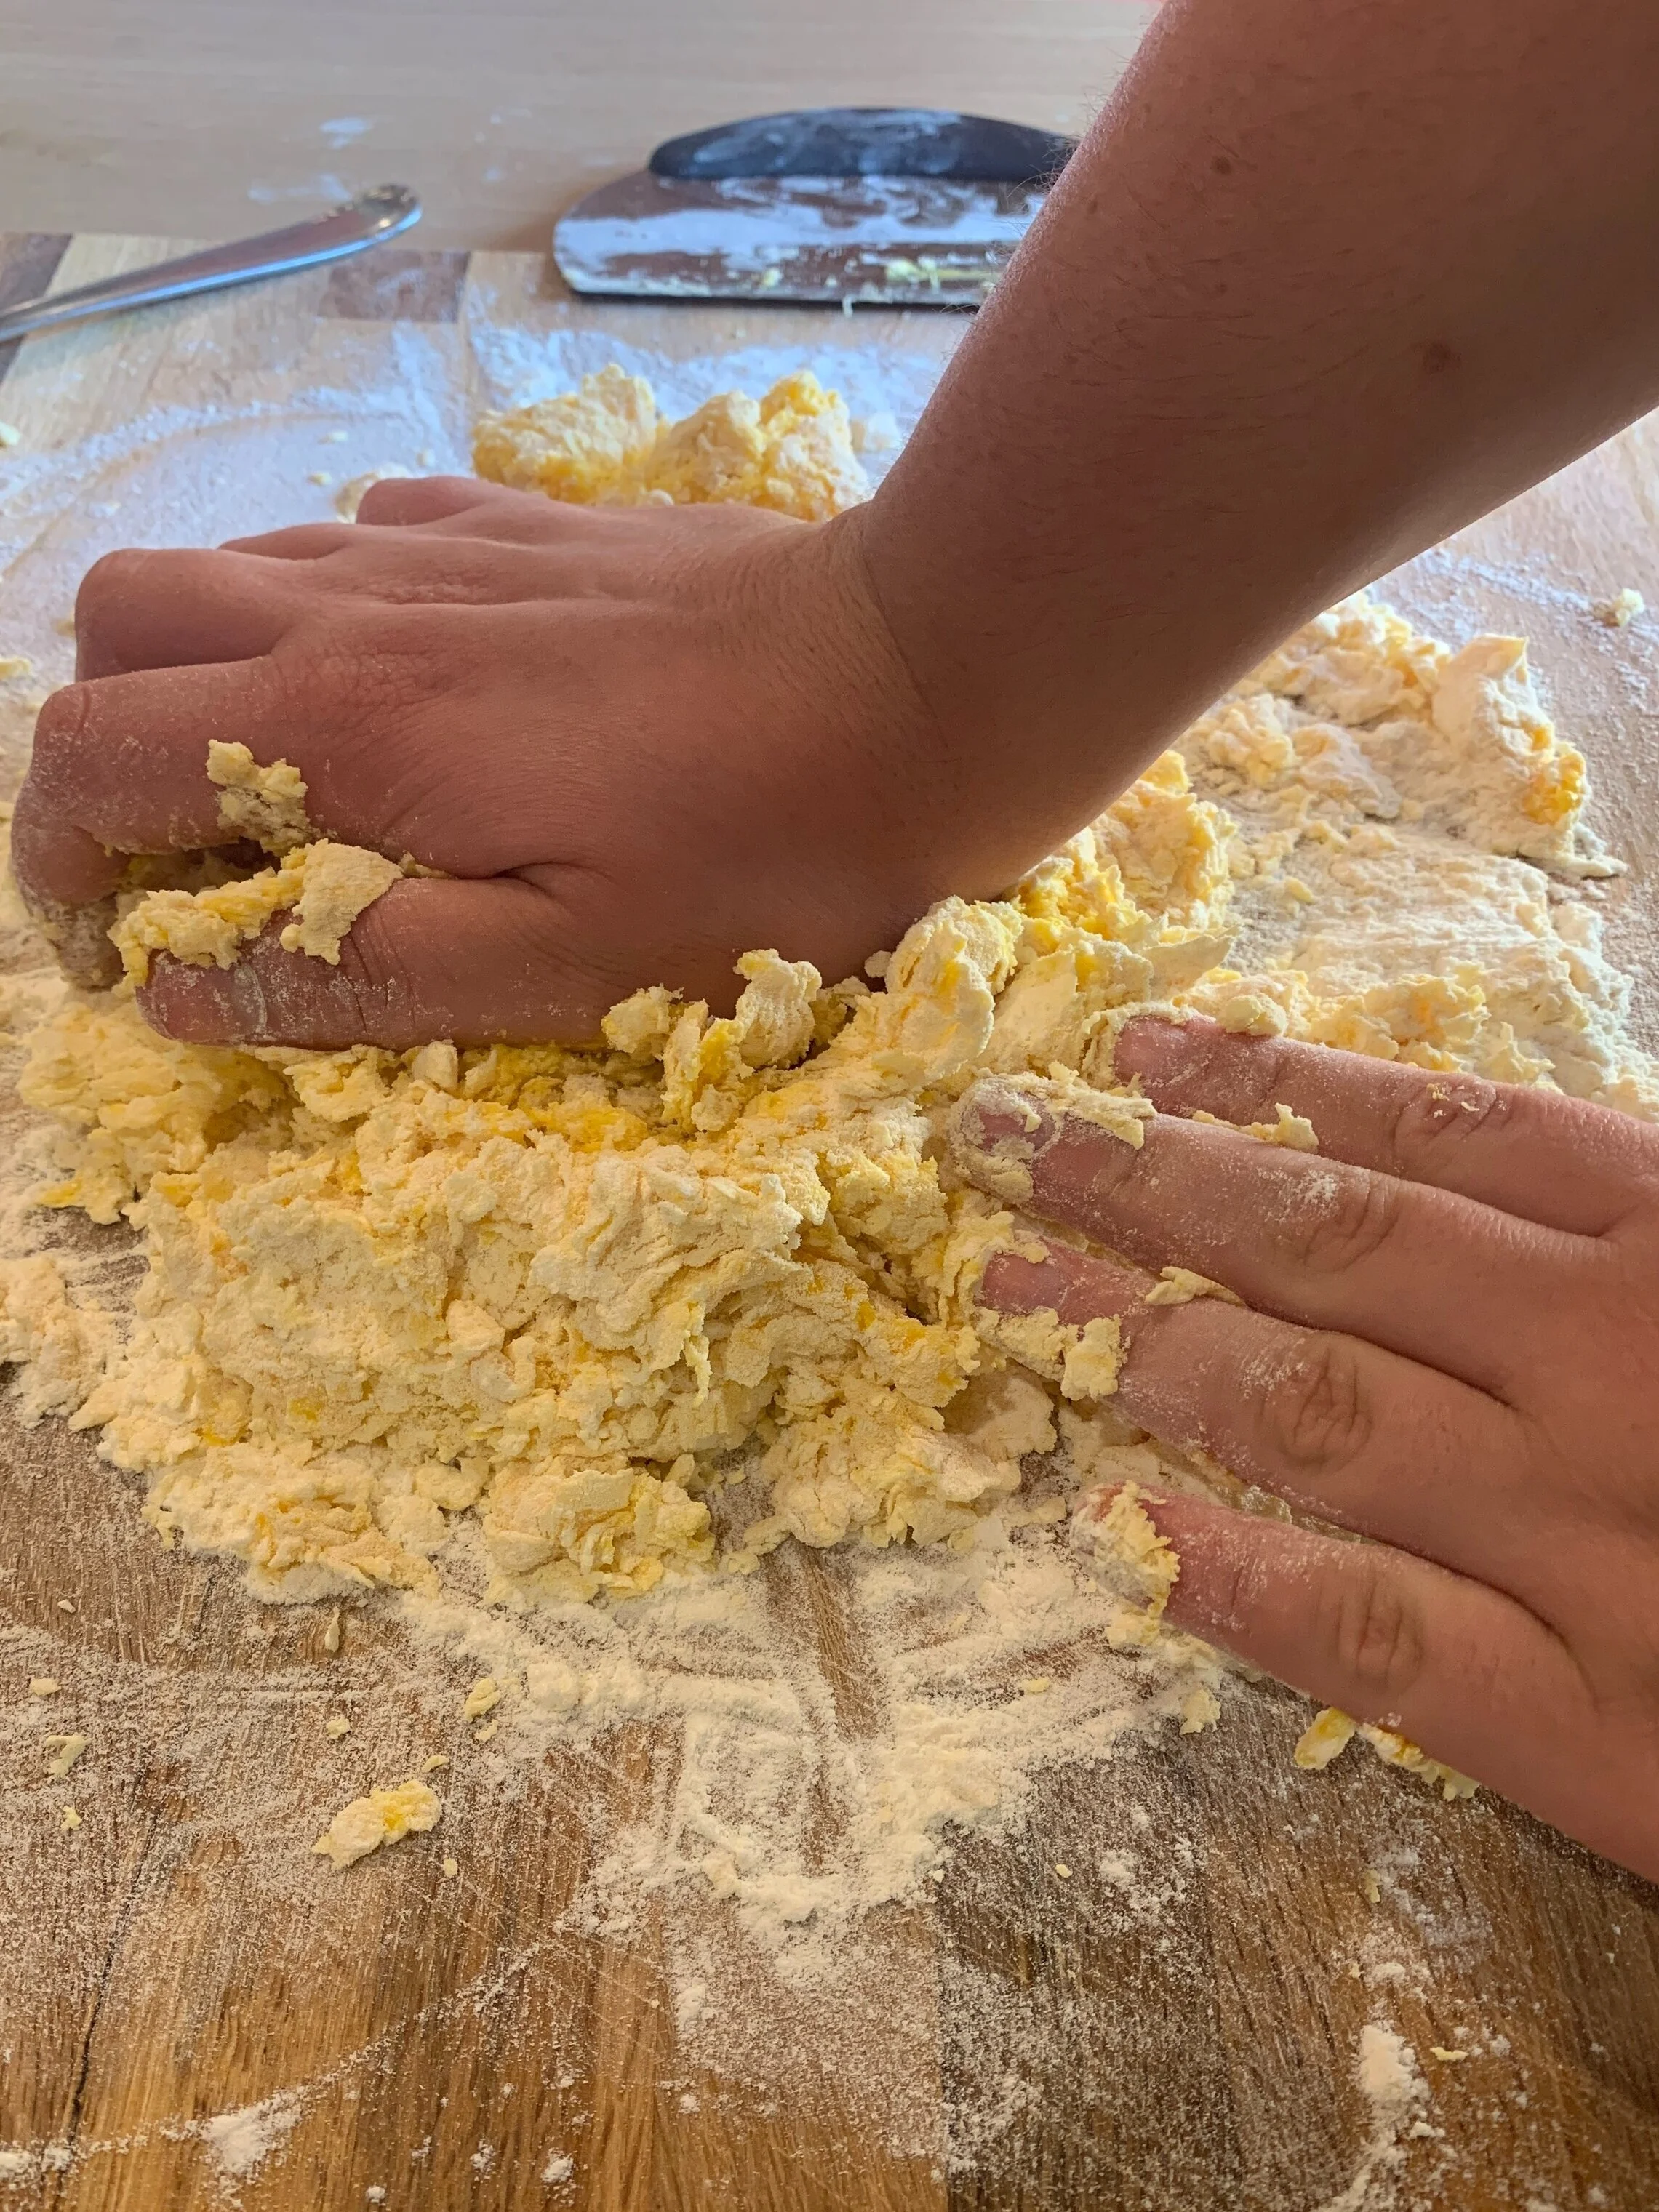
In order of the photos below, the method is as follows:
Dump your flour on your work surface, and use your fingers to create a well with reasonably high borders. Crack your eggs into the well.
Begin to mix, scrambling the eggs a bit before you make an effort to sweep in any of the flour.
Slowly begin incorporating small amounts of flour from the sides of the well. Move your fork in a circular motion, and try not to break the walls at this point; the eggs are still too runny and would run all over your board.
As you keep incorporating flour, you’ll notice that the eggy center will become too thick to properly work with a fork. When it is thick like a custard, you’re ready to move on to the next phase.
Some people go straight to working with their hands at this point, but I like to use my bench scraper for a minute or so. At this point you can begin to break the walls of the well, and use your bench scraper to fold and chop, incorporating larger amounts of flour.
Continue working the dough with the bench scraper until a shaggy dough forms. It’s ok if there appears to still be too much flour on the board. Resist the urge to add water at this point; the dough will continue to absorb flour as you knead it by hand.


7. Start kneading the dough vigorously by hand, similarly as you would a bread dough. You’ll need to work the dough for around 10 minutes. You may need a spritz of water or a sprinkling of flour if the dough proves to be incredibly dry or sticky, but never add too much at once.
8. If your dough looks like the second-to-last photo, keep kneading. It doesn’t need any more water at this point, just more time to fully incorporate the remaining bits of flour and to develop the gluten.
9. Your dough is ready when you’ve achieved a smooth, homogenous look, and when a dimple made by pressing a finger into the dough ball quickly rises back up towards you. At this point, wrap the dough in plastic (some people also simply place it under an inverted bowl, but if your climate is dry, I don’t recommend this) and let the dough rest for at least 30 minutes, but up to several hours, at room temperature. If you let the dough rest in the fridge, you will need to bring it back to room temperature before use.


Durum Wheat Pasta Dough
This dough is incredibly easy to make, knead, and work with. I use it for shapes such as orecchiette, cavatelli, lorighittas, and culurgiones.
There are only two ingredients: durum wheat (semola) flour and water. The ratio of flour to water is 2:1, so you can easily scale the recipe depending on how many you need to feed.
The following amounts should be appropriate for 4-5 people:
400g durum wheat flour (I prefer semola rimacinata)
200g water
The method here is basically the same as for the egg dough. Make a well with the flour. I then gradually pour in the water, mixing directly with my hands as I go. Knead the dough until completely smooth, and then cover and allow it to rest before using.
Variations
You’ll see some recipes on this blog that have a mixture of both 00 flour and semola flour. Depending on the shape, adding a bit of the semola to an egg dough isn’t always called for, but sometimes it can add a bit of texture and heartiness that stands up well to certain shaping and sauces.
Some other shapes, such as Tuscan pici or Ligurian trofie, may call for a dough made out of soft flour and water, instead of semola flour. When this is the case, the exact ratios will be indicated in the appropriate recipe.
Some other regional recipes may call for a bit of olive oil, butter, milk, or even wine in the dough. This will replace some egg or water content, and will always be indicated when appropriate.
Storage
If you’re going through the effort to make fresh pasta, try to enjoy it the day of. It cooks incredibly fast and has a remarkable texture.
But, if you made too much, or want to have handmade pasta ready to go any day of the week, you can store your finished pasta.
Pasta dough can last a few days in the fridge, or in the freezer for a few months. When freezing, arrange the pasta so they are not touching on a baking sheet that has been lined with a lightly floured towel. Once they are frozen solid, you can consolidate them in a bag. Pasta kept in the freezer or fridge can be added directly into boiling water without thawing.
You can also dry your semola or egg pasta. Drying times will depend on the shape and type of dough, but once any pasta is completely dried through, it can be stored in a cool dry place for a few months.
Coming Soon:
A step-by-step guide on how to roll out your rested pasta dough into sheets that are ready for shaping.